
Introduction
Marci is a powerful assassin and duelist. If you don't like farming, I have good news: Marci can't farm to save her life. All of her abilities rely on allies, and some of them strictly on an allied hero.
Her strength is that she somehow needs very little gold to function, yet she always finds something extremely useful to buy with any gold she earns. Her engages are subtle by default, which makes her powerful on the offense, and with her ultimate, Unleash, she can win a one on one duel against any hero.
Her weakness is that she is extremely team reliant. You will be counting down the seconds until your position 1 stops farming and joins the team, because one extra teammate means a lot to her. She is also vulnerable to crowd control, the stuns, silences and other disables that stop her from acting. Black King Bar (BKB) solves some of it, but heroes like Pudge, whose crowd control pierces BKB, can shut her down, since a lot of her durability comes from lifesteal and from the movement speed Unleash gives her (assuming you used Rebound and Dispose to engage).
She must also respect her Unleash and BKB timings. With both ready, she can look to duel, teamfight or rush down towers. Without them, she is limited to skirmishing and saving teammates.
Saving teammates is an amazing part of her kit, because every one of her abilities can peel for an ally, meaning get them out of trouble. Rebound is the biggest one: it lets you literally Blink Dagger a teammate, without Blink's damage limitation and with bonus movement speed on top. Bodyguard shields them and gives them lifesteal. Dispose is a good fallback when Rebound is on cooldown. Unleash helps the least, though its slow still counts.
Because her engages are so subtle, the threat of Marci alone can keep enemy heroes from showing on the lanes, though she can also be baited into a bad situation.
Marci in numbers
From RainbowCape's data, pulled 3 October 2026. It updates every month.- Pos 1Carry4%
- Pos 2Mid39%, covered by this guide
- Pos 3Offlane5%
- Pos 4Soft support29%, covered by this guide
- Pos 5Hard support23%, covered by this guide
This guide's roles cover about nine in ten of her games.
Win rate is from the past week of public games, and positions from the past four weeks. Best phase comes from about 250,000 league games across many patches. Lane bully and Rune control come from fully analysed Legend and above games.
Abilities

Special Delivery
InnateThis is deceptively good. Your team's couriers take an extra hit to kill and begin the game flying. The first few minutes are the hardest for your teammates, and this really helps them.
For you, it teleports your items straight to you. Feel free to spam it, since it's a win-win ability, but try to use it when you buy milestone items rather than their components. For example, use it when you have all the components for a Magic Wand, Phase Boots, Skull Basher or BKB, not for a component or a minor item like a Tango, unless you need it right away.
Valve's tooltip
Marci whistles to instantly summon her courier to her. If the courier started in the fountain, it will take items from Marci's stash. After teleporting it will transfer these items to Marci and head back to the fountain. Passively grants all allied couriers 3 bonus levels and 1 bonus health.
- Bonus Levels3
- Courier Max Level30
- Bonus Hp3
- Cast Time1

Dispose
If an enemy walks into melee range of your winions (that's what I call lane creeps), Dispose them into your wave to deal a lot of damage.
Level 2 is an important power spike, since before Unleash our damage combo is Rebound into Dispose.
Valve's tooltip
Marci grabs an allied or enemy target and throws it effortlessly behind her, damaging and slowing the unit if it's an enemy. Any enemy units in the landing area will also be damaged and slowed.
- Landing Radius300
- Air Duration0.5
- Air Height150
- Throw Distance250
- Pull Angle230
- Slow Duration3
- Impact Damage60 / 150 / 240 / 330
- Movement Slow20% / 30% / 40% / 50%
- Cast Range175
- Cast Time0.2

Rebound
Each level of Rebound adds range, which makes it our number one priority to level up. It is also our main ability for saving teammates.
Valve's tooltip
Marci bounds to the targeted allied unit, choosing a direction and distance she will spring away from it. Upon reaching the unit, Marci lunges to her final destination, damaging and stunning enemies where she lands. When Rebound is set to alt-cast, Marci brings the target ally with her to her final destination. The ally receives 25% bonus movement speed for 4s.
- Move Speed1700
- Cast / Jump Range450 / 550 / 650 / 750
- Cast Range450 / 550 / 650 / 750
- Landing Radius300
- Impact Damage75 / 150 / 225 / 300
- Stun Duration0.8 / 1.1 / 1.4 / 1.7
- Min Lob Travel Time0.1
- Max Lob Travel Time0.2
- Ally Buff Duration4
- Ally Movespeed Pct25
- Cast Time0.1
With Aghanim's Shard: Increases damage. Rebound can be cast on enemies, and causes Marci to also get the speed boost when she casts it.

Bodyguard
This ability is so good. It gives us a lot of durability and damage. Just remember that the barrier is shared with your partner, so it can be drained very quickly.
Valve's tooltip
Passively grants Marci lifesteal and bonus attack damage. When cast on an ally, she provides them with 75% of her passive lifesteal and attack damage bonus. Additionally Marci creates a shared all damage barrier for herself and her partner. As Marci attacks heroes, 30% of the damage dealt restores the barrier.
- Duration7
- Lifesteal12% / 18% / 24% / 30%
- Bonus Base Attack Damage12% / 18% / 24% / 30%
- Creep Lifesteal Reduction Pct40
- Bodyguard Attack Range Buffer125
- Max Partner Penalty75
- Counter Cooldown0.45
- Shared Barrier Amount90 / 160 / 230 / 300
- Shared Barrier Replenish Amount30
- Cast Range600
- Cast Time0.2

Unleash
UltimateYeet Yeet!
Nothing too special to say about Unleash. Our goal is to kill the enemy supports when we can, but realistically we can burst down anyone.
Unleash is a huge power spike. Even if we had to play a defensive lane because the enemy had the better one on one, once Unleash is up, they no longer do.
Valve's tooltip
Marci taps a hidden power, gaining Fury charges that allow her to deliver a rapid sequence of strikes that slow movement and attack speed of the target for 2s. The last strike in every Fury combo creates a damaging pulse around the target. In between Fury combos, Marci is unable to attack for 1.5s. Marci gains 15% movement speed when Unleash is cast.
- Duration16
- Strikes Per Fury5
- Bonus Attack Speed700 / 925 / 1150
- Time Between Flurries1.5
- Pulse Radius800
- Pulse Debuff Duration2
- Pulse Damage50 / 100 / 150
- Movement Slow30%
- Base Attack Speed Slow60 / 80 / 100
- Max Time Window Per Hit1
- Bonus Movespeed15
- Recovery Fixed Attack Rate2
- Shard Push Length300
- Cast Time0.2
With Aghanim's Scepter: Reduces Unleash cooldown by 10.0 seconds and causes Unleash to apply a basic dispel on Marci. While Unleash is Active, all of Marci's abilities unleash pulses when cast. All of Marci's unleash pulses will silence units for 1 seconds. DISPEL TYPE: Basic Dispel
Skill order
| Ability | 1 | 2 | 3 | 4 | 5 | 6 | 7 | 8 | 9 | 10 | 11 | 12 | 13 | 14 | 15 | 16 | 17 | 18 |
|---|---|---|---|---|---|---|---|---|---|---|---|---|---|---|---|---|---|---|
| Dispose | 2 | 4 | 13 | 14 | ||||||||||||||
| Rebound | 1 | 3 | 5 | 7 | ||||||||||||||
| Bodyguard | 8 | 9 | 10 | 11 | ||||||||||||||
| Unleash | 6 | 12 | 18 |
Talents come on their own at levels 10, 15, 20 and 25, on top of that level's skill point.
Talents
Midlane
As a mid, we're farming experience more than anything, racing to our level 6 power spike, when Unleash comes online.
Starting items

Tango
×190 goldTango costs 90 gold for 3 charges, and each charge restores 112 HP over 16 seconds, 336 HP in total. That is 3.73 HP per gold, or 0.27 gold per HP, which is great at level 1.
Afterward, a Healing Salve is usually better. It is only about 4.5 percent more gold efficient, but it heals about four times faster.
Tango still wins when you need drip healing, since enemy damage does not cancel it, so keep one or two charges for lanes where you are harassed constantly.
Valve's tooltip
Devour (use): Consumes a target tree to gain 7 health regeneration for 16 seconds. Consuming an Ironwood Tree doubles the heal duration. Comes with 3 charges. Can be used on an allied hero to give them one Tango. Tree Range: 165

Quelling Blade
×1100 goldLast Hits.
Valve's tooltip
Chop Tree (active): Destroy a target tree.
Quell (passive): Increases attack damage against non-hero units by 8 for melee heroes, and 4 for ranged.

Iron Branch
×455 goldEach branch gives +1 to all attributes, which is 1.35 damage on Marci.
Do not use a Tango on a planted branch, unless you were going to sell that branch anyway, since selling only returns half its price. Eating the planted tree with a Tango doubles the Tango's duration, from 112 HP to 224 HP. It sounds like a great deal, but with the branch at 55 gold it is not gold efficient. A Tango on a normal tree gives 3.73 HP per gold, or 0.27 gold per HP, while a Tango on a planted branch gives 224 HP for 85 gold (one 30 gold Tango charge plus the 55 gold branch), which is only 2.64 HP per gold, or 0.38 gold per HP.
Valve's tooltip
- +1 All Attributes
Plant Tree (use): Targets the ground to plant a happy little tree that lasts for 20 seconds.
The first minutes
First, I like to help my team secure the bounty runes. Rebound is a powerful tool here: at level 1 it can stun up to five heroes, or, if the enemy ganks us, help an ally escape.
Marci has a small frame, which makes her hard to creep block with, so the first wave often meets on the enemy's high ground. This isn't the end of the world. Marci is melee, which makes her tankier than a ranged hero, so we can pull the enemy winions' aggro again and again until the wave climbs onto our high ground. We paid for that spot with HP, so don't lose it by accidentally letting our tower kill the enemy winions.
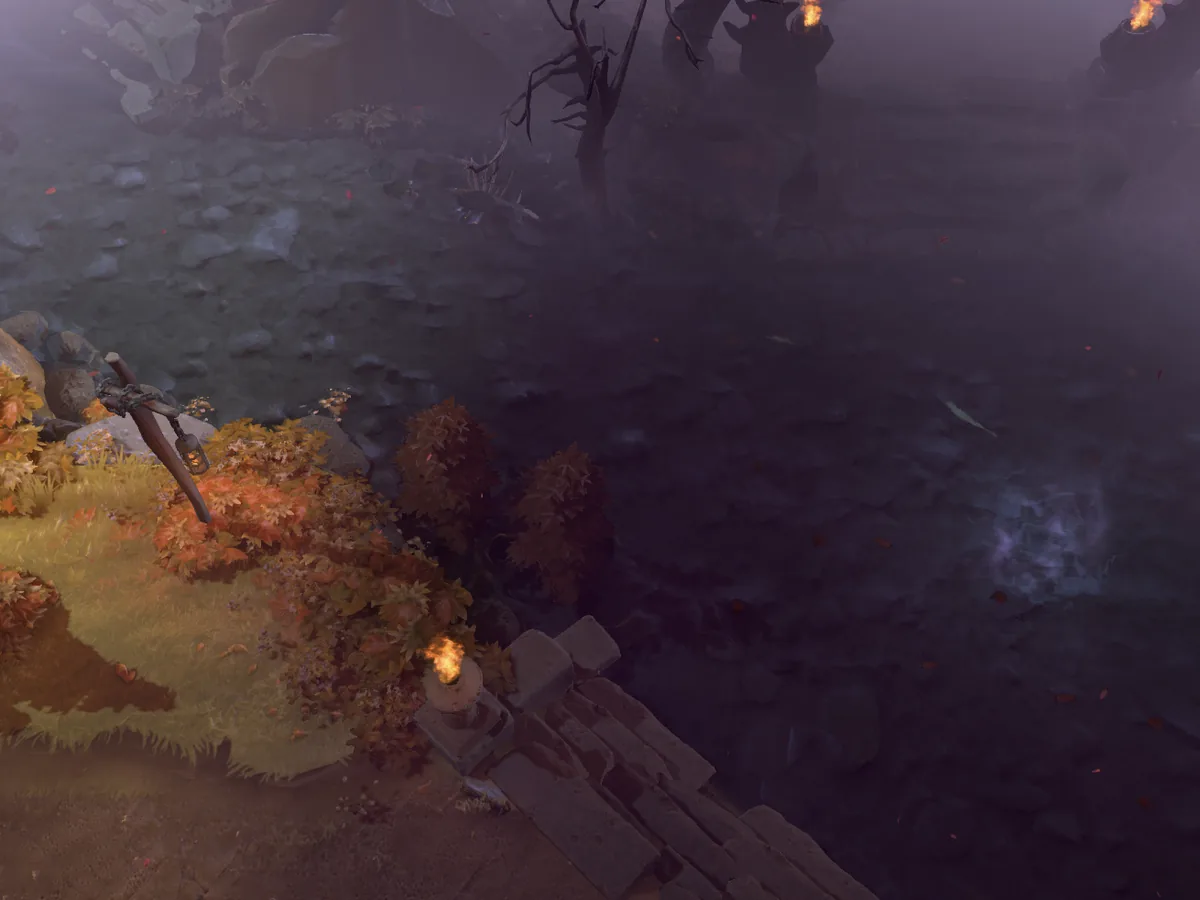
A ward on our own high ground is a big help in mid. There are many good spots, but my favorite is next to the double trees. There's a pair on each side of the lane, and either works. The trees block the ward's view of the rune, so cut them down with your Quelling Blade. The pictures show the Radiant side.

Consumables

Enchanted Mango
65 goldMango is a win-win item.
Either it sits in your inventory and gives you 0.4 HP regeneration, or you eat it and instantly restore 100 mana, which is 1.54 mana per gold, or 0.65 gold per mana.
Unlike Clarity, it cannot be interrupted, so it is great for aggressive laning.
Valve's tooltip
- +0.4 Health Regeneration
Eat Mango (use): Instantly restores 100 mana.

Healing Salve
100 goldYou Should See The Other Mid.
Healing Salve costs 100 gold and restores 390 HP over 13 seconds, which is 3.9 HP per gold, or 0.26 gold per HP.
A Tango on a planted branch restores 224 HP over 32 seconds for 85 gold, which is 2.64 HP per gold, or 0.38 gold per HP. That makes Salve about 48 percent more gold efficient and roughly four times faster.
The catch is that Salve can be cancelled: if an enemy hero hits you, the healing stops.
Valve's tooltip
Salve (use): Grants 30 health regeneration to the target for 13 seconds. If the unit is attacked by an enemy hero or Roshan, the effect is lost. Heals for half the amount per second when cast on an ally.

Observer Ward
FreeVery important at night, because without vision you can't see many heroes or set them up for the kill. In my opinion, buying wards isn't only the position 5's job.
Valve's tooltip
Plant (use): Plants an Observer Ward, an invisible watcher that gives ground vision in a 1600 radius to your team. Lasts 6 minutes. Hold Control to give one Observer Ward to an allied hero.
The lane
Until we're level 2, the lane is dangerous. Once we're level 2, we can force trades. Just remember that every trade costs mana and HP, so ship one to three sets of Tangos during the lane. HP is a lot easier to come by than mana, which realistically only Mangos and the runes will give back.
Fighting over runes is risky, but Marci is a strong laner, so even against a Queen of Pain you'll be able to grab a water rune. Still, experience comes first. Often you'll feel like you need the runes for the mana. Even so, Bottle isn't worth it, as my Bottle math shows.
The combo to keep in mind: when you Rebound in, Dispose the enemy hero into your winions. Smart enemies won't right-click you, so they won't draw your winions' aggro, and be careful not to draw too much aggro yourself. Remember, you only draw aggro by right-clicking, not with abilities.
Every now and then, a brave soul lets you Dispose them under your tower, and then it's GG. Body block them while you right-click.
Last hits and denies matter a lot. Last hits are your gold, and every deny halves the experience the enemy gets from that winion, which keeps them behind in the race to level 6.
Windranger and Necrophos are the hardest lanes. Necrophos is a hard counter. Even if you throw him under your tower, Ghost Shroud stops the tower from attacking him, and Death Pulse lets him win every trade, dealing damage and healing at the same time. Windranger's Windrun makes her evade every attack, and Unleash's strikes are attacks, so late in the game, when Windrun lasts longer, she can dodge our flurries. It also lets her reposition and run away after we Rebound and Dispose onto her.
The lane matchups below come from the data and measure who wins the game, not who wins the lane, so a hard lane like Necrophos may not show up there.
Lane matchups
MidAgainst the enemy mid
Hardest lanes
 WindrangerMarci wins 50.6% in 3,811 games−3.9
 EarthshakerMarci wins 49.1% in 5,299 games−3.1
 Queen of PainMarci wins 53.3% in 5,631 games−2.5
 Ember SpiritMarci wins 51.1% in 5,516 games−2.4
Best lanes
 Arc WardenMarci wins 55.4% in 2,924 games+3.9
 LinaMarci wins 57.6% in 11,310 games+1.5
From 5,240,957 Legend and above matches, 15 September 2026 to 3 October 2026. Each game counts only as far as the two heroes most likely laned against each other. The number is how many points better or worse Marci does than both heroes' win rates predict, and a list only shows clear results, so some lists are short.
Laning items

Magic Wand
×1460 goldThe Bristleback destroyer.
On its own, the recipe looks like a bad deal: +1 to all attributes, which is only 1.35 damage on a universal hero.
However, Marci can force trades with Rebound, which pushes the enemy to answer with spells and fills our charges fast. Add the mana Marci is always short on, and Magic Wand becomes a deceptively strong early item.
Valve's tooltip
- +3 All Attributes
Energy Charge (active): Instantly restores 15 health and mana per charge stored. Max 20 charges. Gains a charge whenever a visible enemy within 1200 range uses an ability.

Infused Raindrops
×1 to 3225 goldThis scales really well on Marci, and in many games I buy up to three. It helps with her mana problems, and it protects against magical damage, which is very powerful early, before our resistances are up.
Valve's tooltip
- +0.6 Mana Regeneration
Magical Damage Block (passive): Consumes a charge to block 120 magic damage from damage instances over 75 damage. Comes with 6 charges. When the charges are gone, the item disappears.

Phase Boots
×11,450 goldPhase Boots give Marci the best stats of any boots, and an active that lets her chase through units. But they give no mana, and Marci is usually short on mana, so Arcane Boots (1,500 gold) are the emergency pick.
Consider Phase when your mana is already covered, for example by Falcon Blade and an ally's mana support, or when you are playing Marci as a right-click core against a physical lineup and need the armor and damage.
Valve's tooltip
- +50 Movement Speed
- +18 Damage (MELEE)
- +12 Damage (RANGED)
- +4 Armor
Phase (active): Gives 20% increased movement speed on melee heroes, and 10% on ranged heroes, and lets you move through units and turn more quickly for 3 seconds.

Skull Basher
×12,875 goldSkull Basher is part of who Marci is. Most carries first build an item that speeds up their farming, because they need to scale. Marci builds a killing item, lockdown, because she farms fights and heroes, not winions.
Your first real fighting item, and the reason Unleash kills. Each hit has a 25 percent chance to bash, and a flurry lands five hits almost instantly, so most combos stun the target and deal bonus damage. The bash also works through BKB, which makes it reliable against cores.
Many pros go Aghanim's Scepter first, but I prefer Skull Basher. It is much cheaper, its flat damage is better early, and Aghanim's Scepter is weaker on stats. Skull Basher is also less situational: some heroes don't care about the silence Aghanim's Scepter adds, which feels more like a teamfight upgrade, since it hits an area.
Valve's tooltip
- +30 Damage
- +10 Strength
Bash (passive): Grants melee heroes a 25% chance on hit to stun the target for 1.2 seconds and deal 100 bonus physical damage. Bash chance for ranged heroes is 10%.
Level 6 and ganking
Once Unleash is up, look at the enemy mid. If they have an escape, like Queen of Pain, Ember Spirit or Storm Spirit, use it to gank other lanes or burst down towers. Those heroes like to gank a lot anyway. If it's a Sniper, go get him! A ward is super helpful. Many Snipers, and heroes like him such as Keeper of the Light, stop showing in the lane afterward and look for ganks themselves or farm the jungle. Counter-gank them, or take down the mid tower.
The basic combo is Rebound for the stun, then Unleash for the full flurry of attacks, then Dispose. Without Aghanim's Scepter, always cast Unleash after you land, so you don't waste it. With Aghanim's Scepter, cast it before you jump, since every ability you cast during Unleash then sends out a silencing pulse.
We jump off our winions, which is why leveling Rebound early is so important: we need the range.
Walking is the best way to gank. It gives you time to regenerate HP, mana and cooldowns. I often start walking before Unleash is ready, because I know it will be ready by the time I get there. Teleporting is super important for counter-ganks, and for getting back to defend your tower after a gank.
Between ganks, if Unleash is up, I look for a solo kill, mostly by pushing mid and seeing if someone takes the bait. Check that the other enemy heroes are showing on the map, so you're not the one getting baited. If Unleash is down, I join my team's playmakers for a skirmish, usually the offlaner and the supports, since the carry is farming.
Always cast Bodyguard on a teammate. In theory, the one with the highest attack speed should get it, but keeping teammates alive with its barrier comes first.
I mostly hit towers when my teammates are doing something risky, like a fight I can't join. Might as well split push, and with Unleash up, Marci takes towers down fast. And when the enemy team is dead, spending Unleash on tower damage is a really good idea.
Core items

Black King Bar
×14,050 goldBloodbath.
Before BKB, you cannot play on the enemy side of the map. This can only be learned from experience, but you will need to respect your BKB timing. While it is on cooldown, skirmish with your team rather than looking for fights alone.
Valve's tooltip
- +10 Strength
- +24 Damage
Avatar (active): Applies a basic dispel. Grants 60% magic resistance and immunity to reflected and pure damage. For the duration of the effect, any negative effect from enemy spells has no effect. Duration: 9s Dispel Type: Basic Dispel

Aghanim's Shard
×11,400 goldCheap and huge for kill pressure. Rebound can now target enemies directly, deals more damage, and gives Marci the speed boost herself, so you can jump straight onto a support instead of needing an allied unit to jump off. In this build, it replaces Blink Dagger.
Valve's tooltip
Ability Upgrade (passive): Upgrades an existing ability or adds a new ability to your hero.
For Marci: Increases damage. Rebound can be cast on enemies, and causes Marci to also get the speed boost when she casts it.

Aether Lens
×12,275 goldThe Original Marci Item.
It increases the cast range of our abilities, and it works with the Shard too, improving our ability to engage, disengage and save our teammates.
Many players prefer Blink Dagger, but in my opinion Blink is weak on Marci: it gives no stats, you still need Rebound for the stun, and taking damage stops you from using it. Aether Lens at least brings mana along with its range.
Valve's tooltip
- +300 Mana
- +2.5 Mana Regeneration
- +225 Cast Range

Aghanim's Scepter
×14,200 goldSlows and silences enemies in the area. Casting Unleash also dispels you, clearing slows and other basic debuffs as the fight starts.
Valve's tooltip
- +10 All Attributes
- +175 Health
- +175 Mana
Ability Upgrade (passive): Upgrades the ultimate, and some abilities, of all heroes.
For Marci: Reduces Unleash cooldown by 10.0 seconds and causes Unleash to apply a basic dispel on Marci. While Unleash is Active, all of Marci's abilities unleash pulses when cast. All of Marci's unleash pulses will silence units for 1 seconds. DISPEL TYPE: Basic Dispel

Abyssal Blade
×16,250 goldThe final item, and your answer to BKB. Its active stun goes through debuff immunity, so you can lock down a carry even with their BKB on.
It also greatly improves our sustain: it increases Marci's lifesteal healing and makes slows weaker on her.
Valve's tooltip
- +35 Damage
- +30 Strength
- +30% Slow Resistance
- +16% Health Restoration
Overwhelm (active): Stuns a target enemy unit for 1.6 seconds. Pierces Debuff Immunity.
Bash (passive): Grants melee heroes a 25% chance on hit to stun the target for 1.2 seconds and deal 120 bonus physical damage. Bash chance for ranged heroes is 10%.

Vladmir's Offering
×12,200 goldTemu Daedalus.
This might surprise you, but at this point in the game, your position 1 had better group up with you, OR ELSE.
Vladmir's Offering frees an item slot for up to four of your teammates and gives them damage and lifesteal. Aether Lens increases its aura range too; I tested it in game, although it might be a bug. As a universal hero, Marci benefits from it a lot as well.
Valve's tooltip
- +1 Armor
- +0.75 Mana Regeneration
Vladmir's Aura (passive): Grants 20% lifesteal, 18% bonus damage, 1 mana regeneration, and 2 armor to nearby allies. Radius: 1200
Items I skip

Bottle
Skip675 goldSo... I do not like Bottle.
Bottle costs 675 gold and holds 3 charges, each restoring 110 HP and 60 mana over 2.7 seconds, so a full Bottle is 330 HP and 180 mana.
Buying the same from the cheapest consumables, Healing Salve for HP and Clarity for mana, would cost about 157 gold.
That means Bottle pays for itself after about 4 full uses, and every refill after that is a bonus.
Valve's tooltip
Regenerate (active): Consumes a charge to restore 110 health and 60 mana over 2.7 seconds. If the hero is attacked by an enemy hero or Roshan, the effect is lost. The Bottle automatically refills at the fountain. Hold Control to use on an allied hero.
Store Rune (passive): Runes can be stored in the Bottle for later use by right-clicking them. Unused runes will automatically activate after 90 seconds. Using a stored rune fully refills the Bottle.
Midgame and late game
Marci can't farm, and she isn't item dependent. From minute one, counting the rune fight at the start, she's looking for kills and skirmishes, and key items don't change that goal. She's always looking for solo kills, skirmishes, and, when the enemy team is dead, pushes and Roshan. That's why she can have no gold at all or a lot of it. Of course, before BKB, worry about stuns a lot more.
In fights, prioritize the supports when you can, and aim to stun several heroes with Rebound. With Unleash up, Marci can save teammates by bursting down the enemies on them. Rebound also gives the ally you jump off bonus movement speed, whether you're going in or getting them out. When Unleash is down, when you arrive late, when your team gets caught, or in the middle of a chase gone wrong or a bad engage, saving is the better choice.
The best thing I learned
Sometimes a lane isn't winnable before level 6, and you need to survive it without feeding, because at level 6, you own them.
Support
Marci mid and Marci support play very similarly and build the exact same items, just with less gold. So for the items, see the Midlane build, and for after the lane, see Level 6 and ganking and Midgame and late game.
I honestly don't see much difference between Marci as a 4 or a 5. As a 5 you'll feel more pressure to buy wards, but even Marci mid buys them anyway. Funnily enough, when I play Marci mid, I get a little jealous when the supports buy all the wards.
The side lanes
A lot of the way Marci plays mid carries over to the side lanes. The most important thing to know is that the enemy support will often leave the lane to do something else, like pulling, warding or picking up a wisdom rune. That's the perfect opportunity to go all in on the enemy who's left alone.
Getting a double Rebound matters more here. In mid we only had one enemy to worry about, but in a side lane, catching both enemies literally doubles Rebound's damage. There's no secret to lining it up: they just randomly walk up next to each other, so be ready when they do.
Rebound can also save your carry when they overextend. And in lane, Bodyguard goes to your lane partner, of course, since there's only one other person next to you.
Marci doesn't have time to stack camps, but pulling camps and the ward wars are important.
Marci is so powerful in lane that I think all lanes are easy for her. To be fair, I can see how the heroes below would be harder in lane, but Marci is a strong laner regardless.
Lane matchups
Position 4, off laneAgainst the enemy safe lane, positions 1 and 5
Hardest lanes
 Troll WarlordMarci wins 42.5% in 1,973 games−4.1
 Dark WillowMarci wins 44.6% in 2,863 games−3.9
 TechiesMarci wins 44.7% in 5,524 games−3.3
Best lanes
 Anti-MageMarci wins 51% in 6,966 games+2.7
 LifestealerMarci wins 49.6% in 11,990 games+2.5
 UndyingMarci wins 52% in 8,032 games+2.3
Position 5, safe laneAgainst the enemy off lane, positions 3 and 4
Hardest lanes
- TechiesMarci wins 45.2% in 6,744 games−2.6
 AxeMarci wins 46.6% in 10,993 games−2.2
 Spirit BreakerMarci wins 44.3% in 9,912 games−2.0
 MagnusMarci wins 47% in 7,549 games−1.9
Best lanes
 VisageMarci wins 50% in 1,054 games+3.5
 PhoenixMarci wins 50.3% in 3,608 games+3.1
 Bounty HunterMarci wins 47.9% in 5,289 games+2.8
From 5,240,957 Legend and above matches, 15 September 2026 to 3 October 2026. Each game counts only as far as the two heroes most likely laned against each other. The number is how many points better or worse Marci does than both heroes' win rates predict, and a list only shows clear results, so some lists are short.